How to import and export products in WooCommerce
WordPress is a multipurpose content management system with which you can create anything from a small personal blog to a complete website for a multinational company.
But not only this, but although it is not a specific CMS for ecommerce, using the appropriate tools you can create your own online store in which to sell your physical or digital products.
The best tool for this is undoubtedly WooCommerce, a plugin with which you can create a store of the size you want without having to have advanced knowledge in sales, programming and web design.
One of the main tasks when you have an online store is creating the catalog and this plugin simplifies it as much as possible. How to do it? In this guide we will explain how to import and export products in WooCommerce quickly and easily.
📥 Import products to WooCommerce
The first part of this guide corresponds to importing the products, which you can do with the WooCommerce import wizard or with the help of another plugin. But before this there is an essential step: creating a CSV file with all the products in your catalog.
Create a CSV file
Both the import wizard and third-party plugins require that there be a CSV document that contains the information of all the products to be imported.
In this step you have two alternatives: use the CSV template that WooCommerce provides and that you can download from here, or creating your own template from scratch or from the first one.
To create the template you can use a spreadsheet, for example, Excel, Calc and even Google Docs. The important thing is that the file has a series of columns related to the attributes of the products, for example, name, SKU (a number that individually identifies a product), category, description, availability, and price, among others.
After establishing the attributes, you will need to fill out the file with the data of all the products you want to include in your online store.
Once you finish including all the information, save the file in CSV format.
Recommendations for creating the CSV
If you do not want to have any setbacks in the import process, take these recommendations into account when creating your CSV file:
- Use the utf-8 format in the file.
- Do not include accent marks or special characters.
- In the case of SKUs, write only numbers.
- When you must include several values in the same row, for example when writing labels, separate each one with commas.
- In fields whose answer is Yes or No, for example when availability must be indicated; Write 1 for Yes and 0 for No.
- In no case are images imported, but rather their URLs (we will explain how to do this later).
Import products to WooCommerce with the import wizard
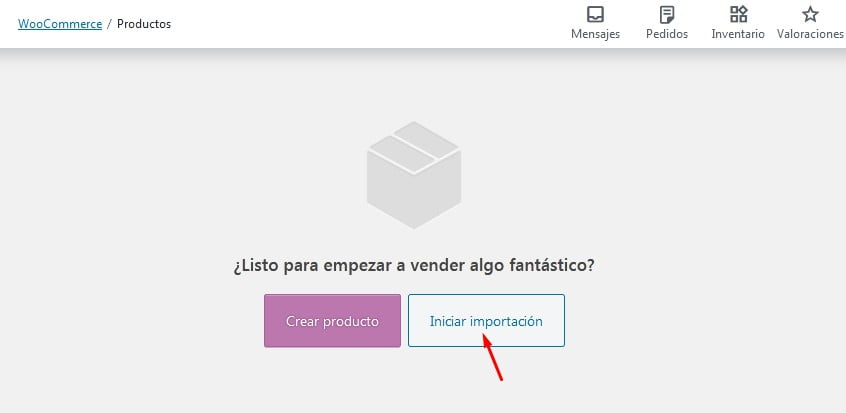
To start importing products from your store, click WooCommerce > Products.
Here you can create the new product individually or start the import. In this case, click Start Import.
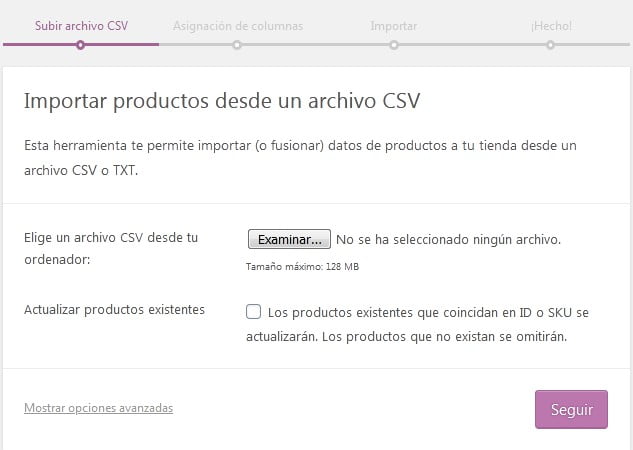
After this the import wizard will begin. In the first step you have to select the CSV file that you already have prepared. If you already have products uploaded to your store and you want them to be updated if they match some of the ones you have in the spreadsheet, check the corresponding checkbox.
Then press Continue.
The second step is Column Mapping, that is, WooCommerce will take all the columns that are in your CSV file and you must choose which field it refers to among all those available in the plugin.
If you are using the template made by WooCommerce you will not have problems assigning the columns because they will be automatically assigned to their corresponding field. But, if you are using your own template, you may have to manually select which field it corresponds to if the appropriate one has not been assigned.
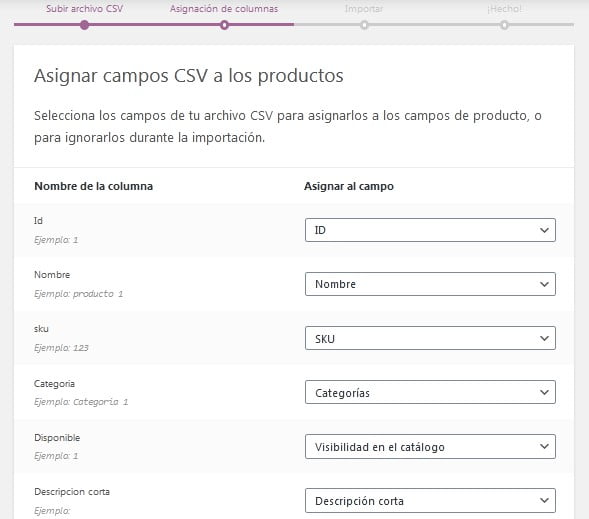
In any case, after assigning the columns to the corresponding fields, press the Run the importer button.
The products will be imported very quickly, although the duration of the process will take more or less depending on the number of products you have in the file.
Finally, you will see a notice telling you that your products have been imported. If an error has occurred, it will also be indicated and you can review it.
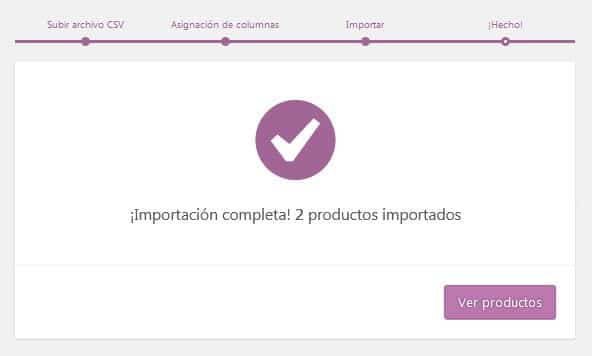
If you want to see the list of products that have just been imported, click on View products.
How to import product images
One of the most common questions when importing products to WooCommerce is how to ensure that the images associated with each item are also imported. But this is easier than it seems.
To be able to mass import product images, you must first upload them to a server or to the WordPress media library to obtain a URL.
In the CSV file, you must insert a column called Images and place, for each product, the URL of the corresponding image. If a product has more than one image you must separate the URLs with commas.
Perhaps the only drawback of this procedure is the time it takes to upload the images when you have many products, but luckily you only have to do this step once.
Import products to WooCommerce with a plugin
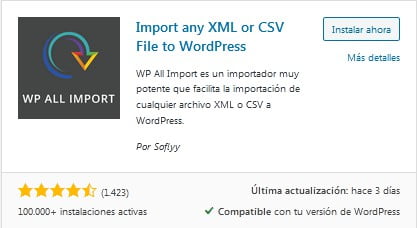
Using the native WooCommerce import wizard is the method we recommend to upload products to the store, but if you want to use another plugin for this function, one of the most complete and simple is WP All Import.
The first step is of course to install it. To do this, go to Plugins > Add New and type WP All Import in the search engine. When you find it, press Install now. At the end of the installation you must activate it.
You must also download and install the Import Products from any XML or CSV to WooCommerce extension from this link and then install it in Plugins > Add new > Upload plugin or paste it in the plugins folder in the file manager of your hosting.
Now you will see in your WordPress menu a new option called All Import, from there click on New Import.
Next, you’ll need to specify how you want to import the information: by uploading a file, from a URL, or using a file you’ve previously uploaded. In this case, since the import will be done from the CVS file you created, press Upload a file.

Search your computer for the CVS file where you have your list of products and select it. When it is loaded, select New Items and in Create New choose WooCommerce Products so that all the records that are in the file are loaded.

Later, you will be able to edit the products that have been imported. When you finish providing the requested information, click Continue to finish the process.
📤 How to export products in WooCommerce
Let’s now look at the case in which you want to export the products you have in your store, either to upload them to another store in WordPress or in any other ecommerce CMS.
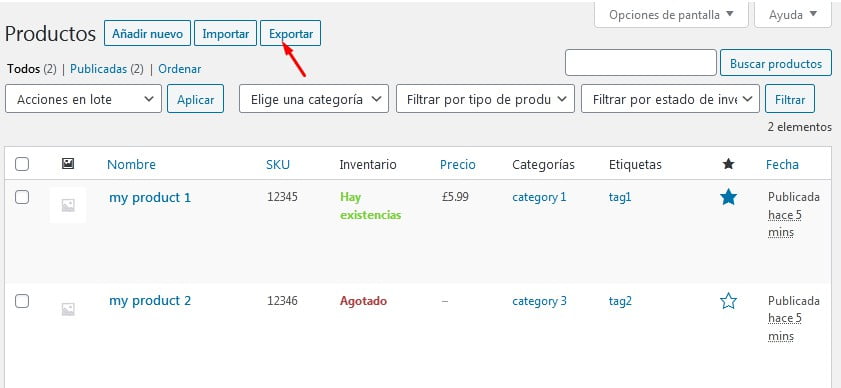
This process is even much simpler than importing and you can do it by going to Products > All Products and clicking the Export button.
The export tool allows you to decide which columns, types, and product categories you want to export. Leave the boxes blank so that everything is exported.
If you prefer some specific products, select the attributes that correspond in each case one by one.
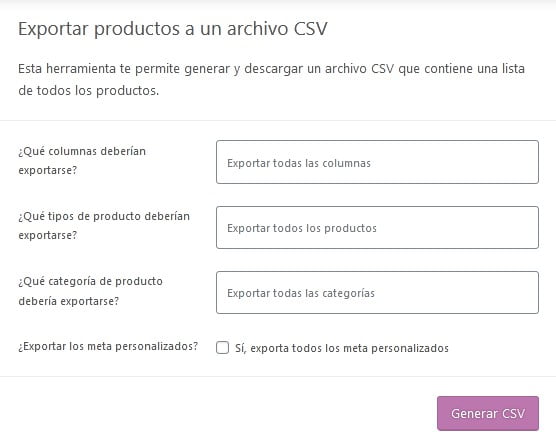
Finally, click Generate CSV. The file will be created and you can save the spreadsheet with the products to your computer.
In this guide you learned how to import and export products in WooCommerce and as you could see, both procedures are simple and done automatically, so what are you waiting for to create your own online store?
No matter its size, with WordPress and Wasabi Theme you can create it.


![Guide to activate and configure WordPress multisite [Multisite]](https://wasabitheme.com/wp-content/uploads/wordpress-multisite-guide-300x200.jpg)