How to Create Product Comparison Tables in WordPress
Creating comparison tables in WordPress is a common practice on affiliate pages, as comparisons tend to perform very well.
How can you create them? While there are different plugins available, we’ve tested two options: TablePress (free but manual and general-purpose) and Wasabi Theme (paid but automatic and designed for affiliate websites).
We’ll walk you through how to use both solutions step by step, so keep reading 😉
How to Create Comparison Tables with the TablePress Plugin
In this section, I’ll explain step by step what you need to do to create comparison tables with TablePress in just a few minutes.
Install TablePress
The first step is to download and install the plugin on your WordPress. To do this, go to Plugins > Add New. In the search bar, type TablePress.
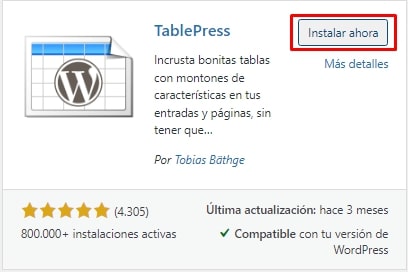
Click on Install Now and once the installation is complete, click on Activate. There you go! You now have the plugin installed and can start using it.
Creating a Comparison Table
This plugin does not require any initial configuration, so you can start creating your tables quickly.
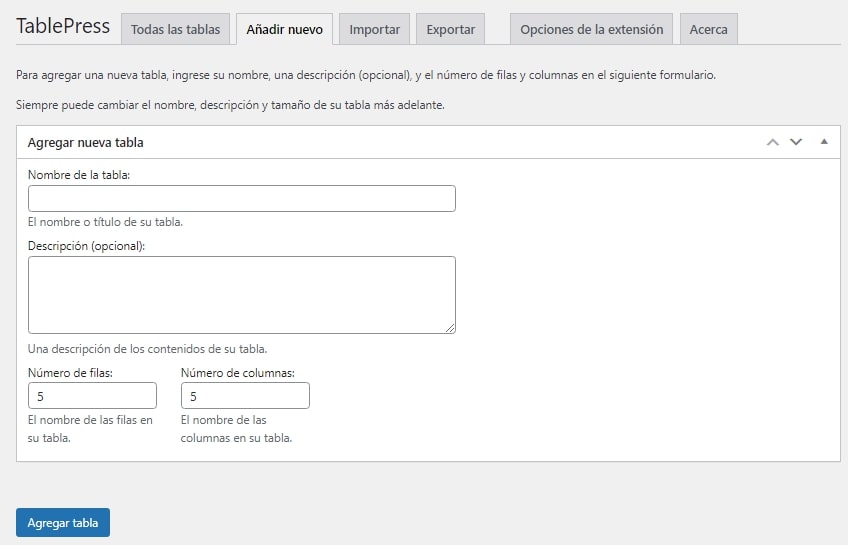
You’ll notice that in your WordPress dashboard, the TablePress menu now appears. Click on it, and then click on Add New Table.
Assign a name to the table, a description (if desired), the number of rows, and the number of columns. Later on, you can add or remove them if necessary. Once you’ve entered the data, click on Add Table.
Enter the content of the table
Now you’ll need to input the information that will be part of the comparison table. You’ll find that the editor is quite intuitive, so you shouldn’t have any issues adding the data.
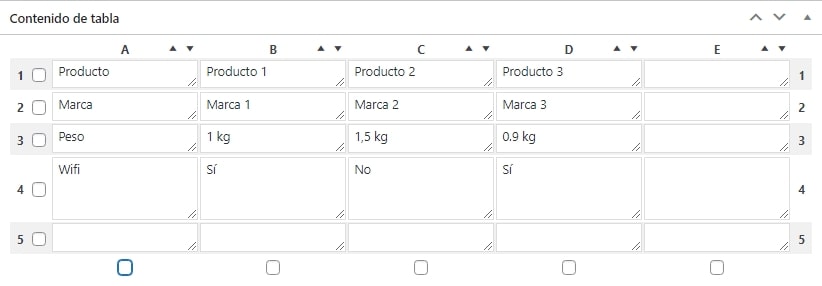
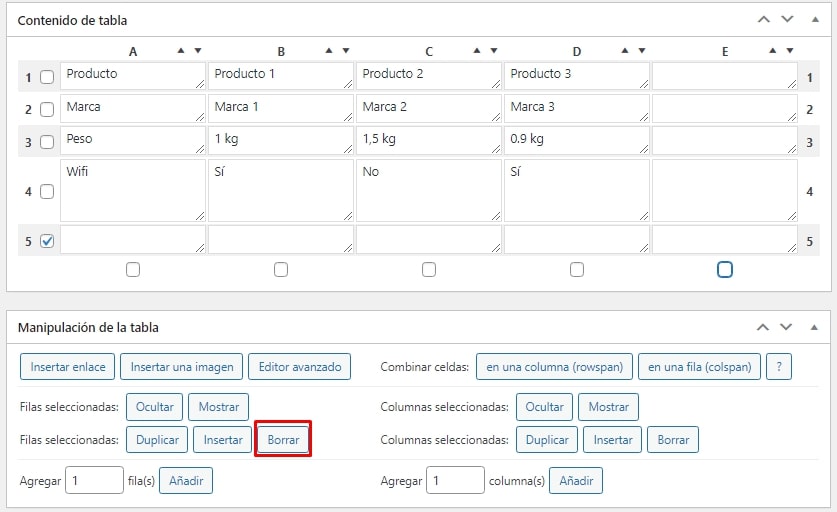
Table Manipulation
Below the table creation options, you’ll see a section called “Table Manipulation,” which contains various buttons. For instance, it allows you to insert links and images into the row or column you’re working on.
Furthermore, you can edit the table in other ways: add, delete, show, or hide rows and columns.
In our example, let’s delete row 5, which doesn’t have any data. To do this, select the row and click on Delete.
If you want to add new rows and columns, simply specify the number of these and click on Add.
Insert the table
Once your table is ready, you can insert it into a post, page, or widget. This is done using the following shortcode: [table id=2 /]. Of course, the id will change to correspond to the table you want to insert.
The result will be something similar to what you see in this image:
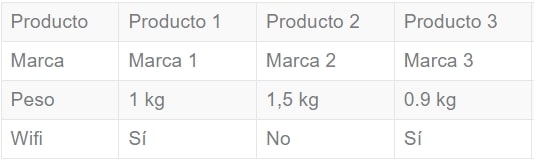
Table Editing
Let’s now customize the table a bit; for example, let’s make the headers bold.
To do this, click on Advanced Editor and select the cell to edit.
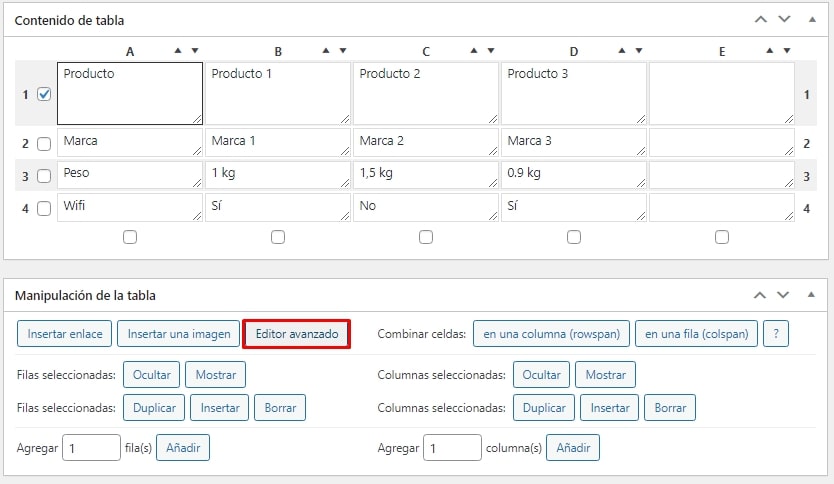
With this, a new window opens, containing several options, including “b” which formats the text in bold. Select it and press Ok.
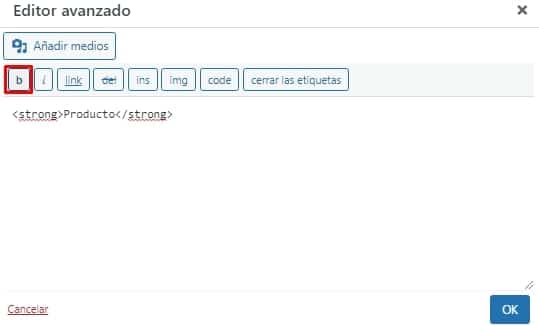
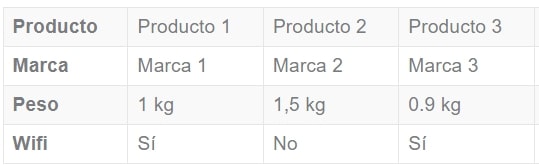
Repeat this process for all the cells you want to make bold. Once you’re done, remember to save the changes.
The result would look like this:
Editing Header Colors
Let’s further customize the table this time by changing the color of the headers to make them more eye-catching.
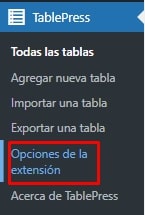
You’ll need to go to TablePress > Extension Options and have a basic understanding of CSS.

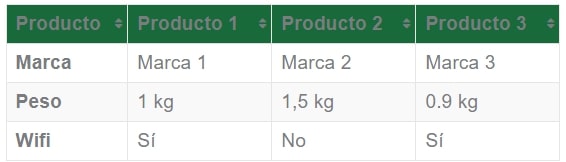
A code you can copy to change the color of the first row is this:
table.tablepress tr.row-1 th {
    background: #6dbb27; /*color que pondrás al encabezado*/
}
The result? Similar to what you see in the following image:
How to Create Product Comparisons with Wasabi Theme
If you want to create product comparison tables quickly and automatically, without having to write everything (or upload images), we recommend using Wasabi Theme.
Wasabi Theme is a WordPress template for affiliate websites, compatible with affiliate programs like Amazon Associates, eBay, and AliExpress Affiliates.
Creating comparisons with Wasabi is straightforward:
- Install the theme on your website.
- Set up integration with the API of your preferred affiliate program. You can see how to do it here.
- Create products using the Wasabi Product block. Simply enter the reference or ASIN. Wasabi will automatically retrieve all product data through the configured API from the previous step. However, you can also manually input some data if needed.
- If you don’t configure the API in step 2, no problem. You can manually create products by entering all the data manually.
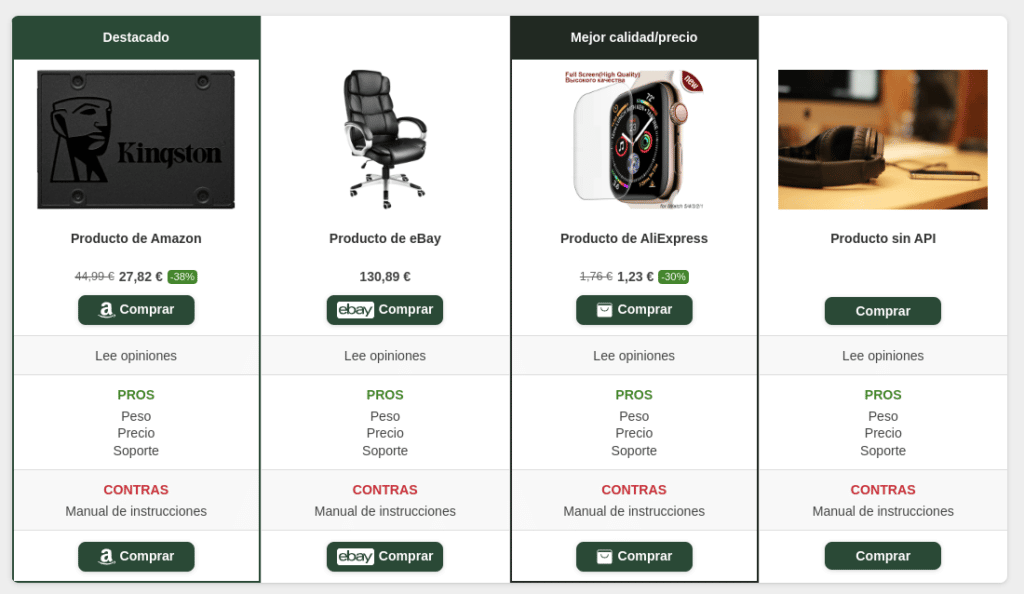
- Insert the Wasabi Theme Comparison block. It will automatically gather data from all products and generate a fully optimized comparison table for conversion.
The result would be very similar to this:
Here you can see a demonstration of a real site with comparisons using the Wasabi Theme:
In this video, you can see how it’s done step by step.
![Guide to activate and configure WordPress multisite [Multisite]](https://wasabitheme.com/wp-content/uploads/wordpress-multisite-guide-300x200.jpg)