How to create a child theme in WordPress
In this post we will teach you how to create a child theme in WordPress step by step so that you can make all the modifications you want without the risk of losing them in the event of updates to your template.
The possibility of creating a child theme is another of the great advantages of WordPress and a clear example of its flexibility, but best of all, this procedure is super simple and you do not need to be an expert web developer or programmer to create it.
But, before teaching you how to create it, it is necessary to know what a child theme is and what it is for.
🤔 What is a child theme for WordPress?
A child theme is a theme that inherits characteristics from a main theme that we can call the parent. In this way, the child will be a copy of the father and will have his files and information.
Thanks to this, it is possible to make modifications to the template without touching anything in the main theme and preventing the changes made from being lost in the event of updates.
With a child theme you can even make changes that the main theme does not allow, without the risk of damaging something.
In order to use this type of themes, it is mandatory to have a parent theme installed that allows the creation of child themes, something that you can make sure of by reading the template documentation.
📖 What is a child theme for?
When you install a theme, it is normal to start customizing it to change the colors, background, typography and even the arrangement of some of the elements in the template.
At first glance, working on a main theme does not have any problem, but in reality there is: when the theme is updated, all the changes you have made to it will be lost.
How to prevent this from happening? Creating a child theme.
A child theme is used to customize a WordPress theme without editing it directly. This way, when updates come out, nothing you have done will be lost.
✅ How to create a child theme in WordPress?
To create a child theme in WordPress there are two options: from scratch (manually) or with the help of a plugin. Below we explain how to do it in each case.
Create a child theme from scratch
For this you need ftp access to your site or, failing that, enter your website’s file manager directly.
To do it via FTP (File Transfer Protocol) you need to have an FTP client, for example, Filezilla, which is one of the most popular and easy to use.
If, like us, you use Filezilla, click on Site Manager and create a New Site with the FTP data of your website. This information should have been given to you by your hosting provider when you hired it.
When you complete the information and create the site, you will be able to access your website files, that is, the files that are on the server.
Whether you are logging in via FTP or directly in the file manager of your control panel, look for the public_html/wp-content/themes folder, which is the directory where the information on all the themes you have installed is stored.
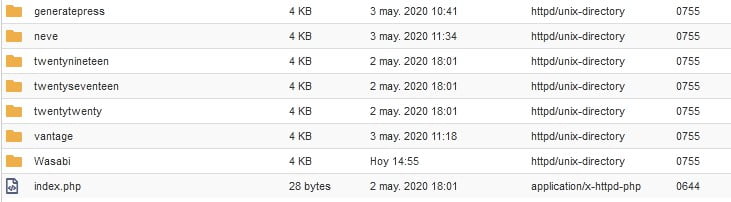
It is within this folder where we will create the child theme.
The first thing is to know which theme you want to create the child of and have it installed. So make sure there is the folder with the name of that theme.
Next create a new folder whose name has this structure parentthemename-child. For example, wasabi-child
When you open the folder, you will notice that it is blank. To add content to it, create a new file called styles.css and copy this code into it:
/*
 Theme Name:   Nombre del child theme
 Theme URI:    Web del tema padre
 Description:  Tema hijo de tema padre
 Author:       Tu nombre
 Author URI:   Tu web
 Template:     Nombre del tema padre
 Version:      1.0.0
*/

// Aquí empieza la personalización de tu tema
Replace the following data in the code:
- Theme Name: the name of the parent plus child theme.
- Theme URI: Theme homepage URL
- Author: name of the person or company that will appear as the author
- Author URI: URL of your website
- Template: Name of parent theme
- Version: Version of your child theme. If you are creating it this will be 1.0.0, when there are modifications adjust this number.
After including all this information, save the file.
We already have a first file in the child theme folder, but we still need another one. Therefore, create a new file and save it as functions.php.
The functions.php code will be:
function wasabi_child_enqueue_scripts() {
    wp_enqueue_style(
        'wasabi-parent-style',
        get_template_directory_uri() . '/style.css'
    );

    wp_enqueue_style(
        'wasabi-child-style',
        get_stylesheet_directory_uri() . '/style.css',
        [],
        wp_get_theme()->get( 'Version' )
    );
}

add_action( 'wp_enqueue_scripts', 'wasabi_child_enqueue_scripts');
Don’t forget to replace Wasabi with your theme name to make it work.
What the previous code does is indicate that the CSS code of the main theme must be loaded and then that of the child theme.
Now the folder will look like this:

With this, you will have already created your child theme, but there is still one more step: activate it.
To do this, you must enter your WordPress and go to Appearance > Themes, you will see all the themes you have installed, including of course the child theme you just created. Select it and click Activate.
This way you are done and can start customizing your site.
Create child theme with a Plugin
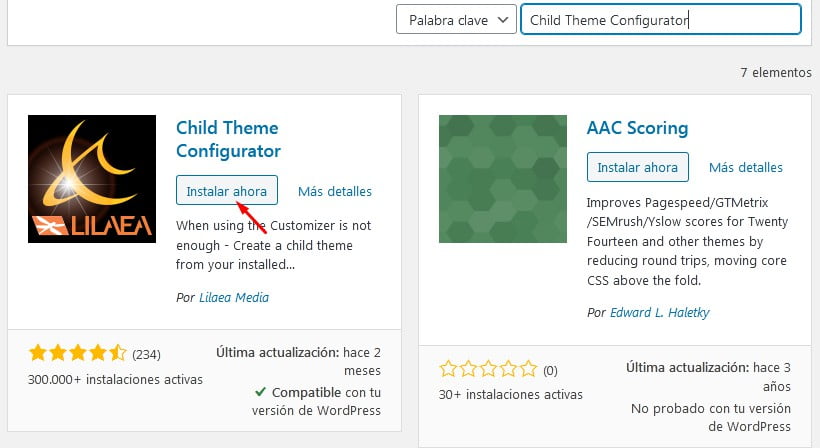
If you prefer to use a plugin that automates the creation of child themes, go to Plugins > Add New and search for Child Theme Configurator, install it and activate it to use it.
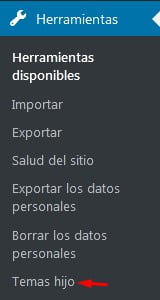
But how do you create a child theme with this plugin? In the Tools menu, you will see the Child Themes option.
Clicking will load the plugin options. In the Parent/Child tab, select Create a new child theme and choose the parent theme, then click Analyze.
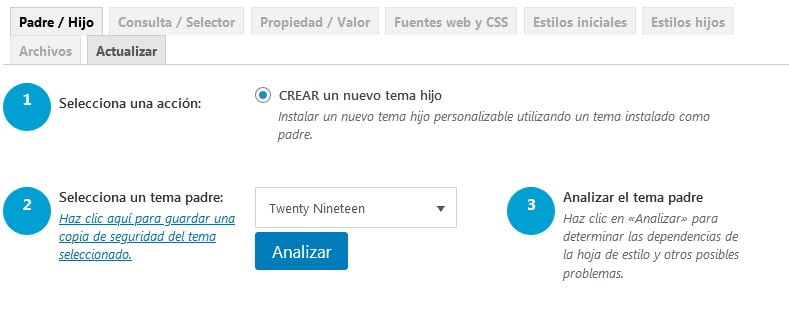
Next, a new directory will be created that corresponds to the child theme, if it does not appear by default, change its name to parentthemename-child.

After this you have to complete the following information:
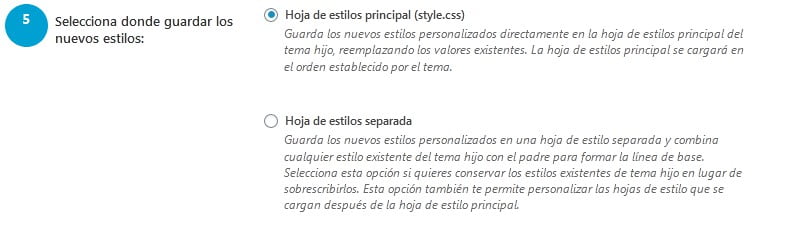
- Where will the new styles be saved? Select Main Style Sheet.
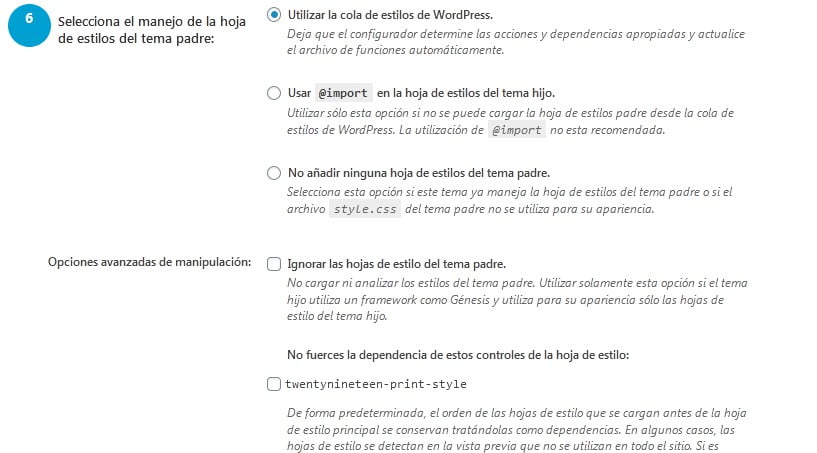
- Parent Theme Style Sheet: To import the styles from the parent theme, select “Use WordPress Style Queue”.
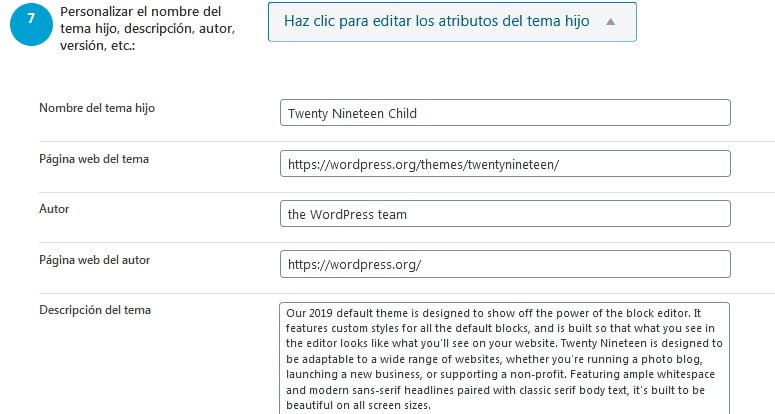
- Child Theme Information: Fill in your child theme information, such as name, author, URL, and Description.
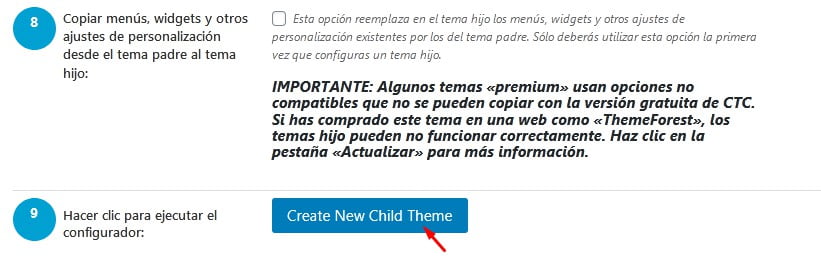
Later you must indicate if you want the customization settings to be copied from the parent theme. You should only check this box if you have been using the parent theme for a while and have made modifications. Finally, click Create New Child Theme.
Wait a few seconds and your child theme will be created.
With this, you will only have to go to Appearance > Themes and activate the child theme you created.
Use a child theme already prepared for Wasabi Theme
If you use Wasabi Theme and you don’t want to get too complicated, you can:
- Download the Wasabi Theme child theme: wasabi-child.
- Navigate to Appearance > Themes > Add New > Upload Theme and upload the previous .zip file.
Whether you choose to do it manually or automated with the help of a plugin, creating a child theme is a good WordPress practice that we should all apply.


![Guide to activate and configure WordPress multisite [Multisite]](https://wasabitheme.com/wp-content/uploads/wordpress-multisite-guide-300x200.jpg)