How to add or change a favicon in WordPress
Creating a website is not only about hosting, a domain, having an attractive design and creating quality content but also paying attention to small details that give it more identity. Among these details is the favicon, an element that is not given the importance it deserves.
Now, how to create, add or change the favicon in WordPress? It’s easier than you think and we’ll explain it to you below.
🤔 What is a favicon?
The favicon is the miniature image that accompanies the name of a web page in the title bar of browsers.

However, its function is to serve as an identifier for web pages saved in favourites. In fact, its name comes from English and is a combination of two words: Favourite and Icon.
It is therefore one of the most relevant design elements on a website because it allows the site to be easily identified both in the browser’s title bar and in favourite bookmarks.
✅ How to create a favicon?
The favicon of a website must be a square icon of about 512 x 512 pixels and can be the same logo of the website in miniature or any other image with which you want to represent your brand.
To create your own favicon you can use any design program that you have installed on your computer or an online alternative like Canva (that’s my favourite!).
However, it is best to use one of the many tools created specifically for generating these icons in png or ico format, for example:
- Favicon Generator
- Genfavicon
- Favicon.pro
- Logaster
- Favicon.cc
✅ How to add or change a favicon in WordPress?
If you have already created your favicon, it is time to add it to your WordPress page and now we will explain how.
Change favicon from WordPress admin
To change the favicon in WordPress from the administrator, you do not need great knowledge, in fact if you use a theme like Wasabi Theme it is a procedure that any beginner can perform.
Once you enter your WordPress dashboard, go to Appearance > Customize > Site Identity.
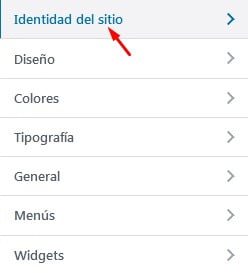
Next, look for the Site Icon section. If you already have a favicon uploaded, you will be able to see it. Otherwise you will only see a box with the text Select the site icon.
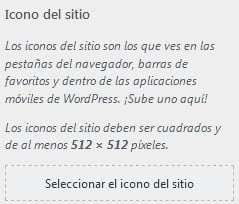
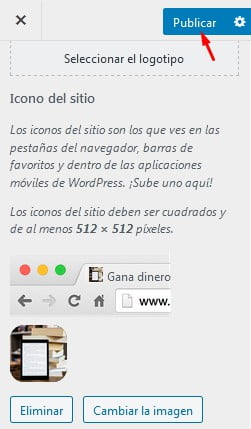
Clicking on the box will open the Media Library from which you can upload your new favicon or choose it from the images already uploaded to your WordPress.
When you have the image, click Select. You can then crop the image if necessary. At the end of this procedure, the favicon will have been loaded and you will only have to click on Publish for the changes to be applied.
Add or change the favicon with a plugin
Despite being a very simple procedure, there will be those who prefer to change the favicon in WordPress with the help of a plugin. If you are one of them, pay attention to this section in which we recommend the best plugins for this task.
Favicon by RealFaviconGenerator
It is the most popular plugin not only to change the favicon in WordPress but even to create an icon compatible with desktop and mobile browsers from scratch.
Once you install and activate it, in the Appearance menu you will see the Favicon option, click on it to start using it.
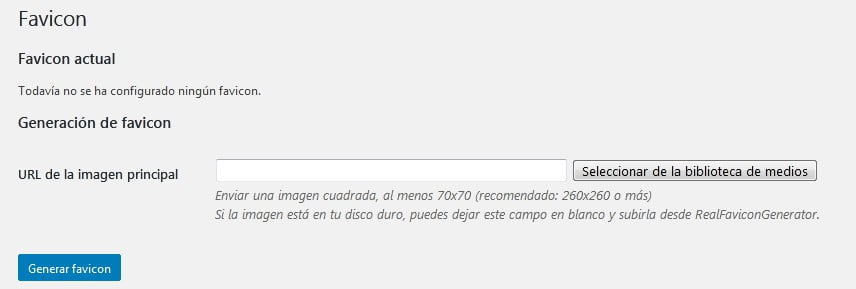
To change or add a new favicon, you must add the URL of the image you will use or search for it in the media library. If you do not have the image on your computer and want to create it with the plugin, leave the field blank.
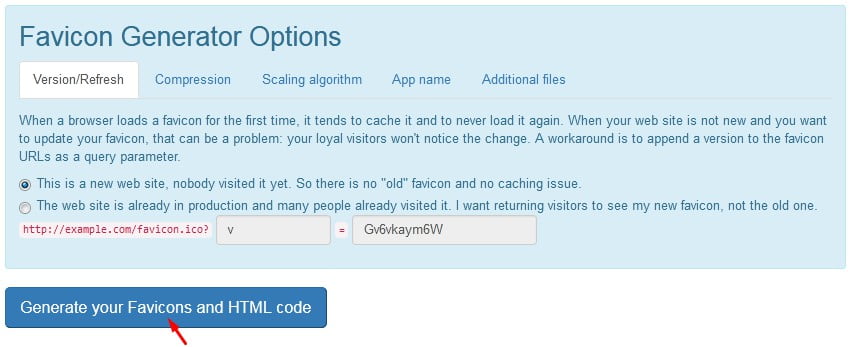
In any case, the next step is to click on Generate Favicon to be redirected to the official page of the plugin where you can create the favicon and obtain its HTML code.
To do this (if you already selected an image) go to the bottom of the page and click on Generate your Favicons and HTML code.
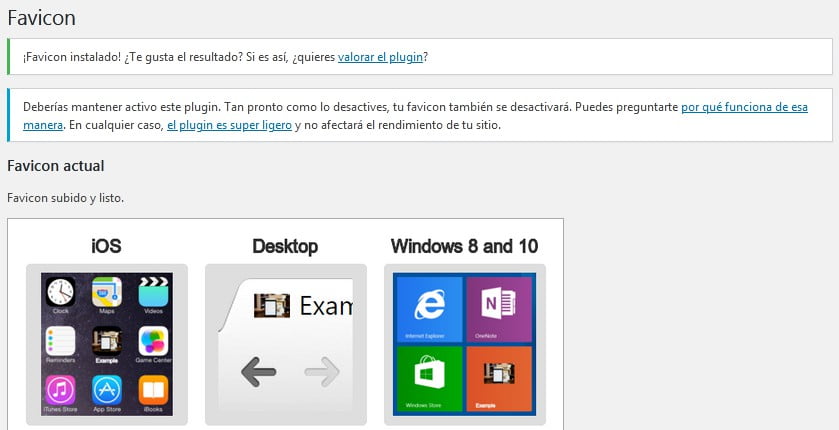
After a few seconds you will be redirected to the WordPress administrator, where you will see how your favicon looks on different devices.
We give you one last piece of advice if you use this plugin: do not delete it or your favicon will stop working.
All In One Favicon
This is the second most downloaded plugin to place a favicon in WordPress and stands out for its simplicity and the speed with which you can have your small icon installed.
When you install it, a new menu with its name is added among the different WordPress options.
To use it you must click on All In One Favicon and previously have the image you want to use on your computer, whether in ICO, GIF, PNG or Apple Touch Icon format.
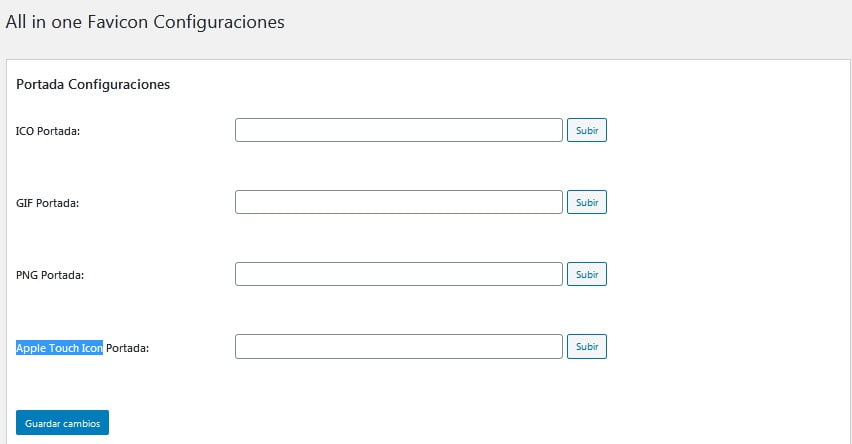
Upload the corresponding image and click Save Changes to let the plugin take care of configuring and placing the favicon.
Favicon Rotator
The last plugin we recommend is Favicon Rotator, another favourite among users.
To use it you must go to Appearance > Favicon to see its options.
As you will notice, it is a minimalist plugin as it only has two options: upload the favicon for the browser and an icon for touch devices.
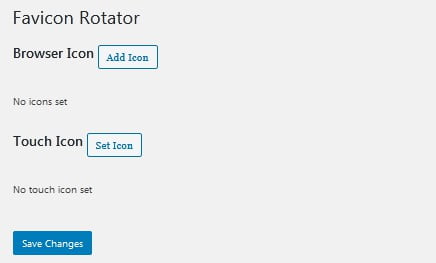
When you click Add Icon or Set Icon, a window will open in which you can load the image you will use or search for it in the media library. Select the icon, edit it if necessary and finally press Add Browser Icon.
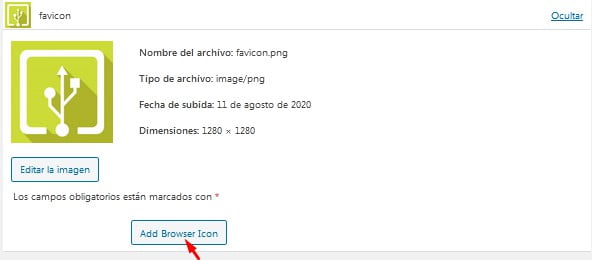
With this, you will have loaded the image and the process ends.
Change favicon by FTP or file manager
There is still another way to add a favicon in WordPress or replace the existing one, we mean doing it with an FTP client, for example Filezilla; or directly from the file manager of your control panel.
Whether you use an FTP client or enter your control panel, you must upload the file with the ico extension that you must have already created to your server.
For most themes, what you need to do is overwrite the favicon you have in the path wp-content/themes/tu_tema/images. That is, you are going to replace the existing one with a new one, or if you didn’t have any, you will upload your first favicon to the folder.
This method has at least two disadvantages:
- You need to know how to navigate the control panel.
- When the theme is updated you will lose the favicon, unless you are using a child theme.
Now that you know the importance of using a favicon and that you know three ways to add it in WordPress, what are you waiting for to add yours? It is extremely easy and fast.


![Guide to activate and configure WordPress multisite [Multisite]](https://wasabitheme.com/wp-content/uploads/wordpress-multisite-guide-300x200.jpg)